Designers increasingly place the Socket Box at strategic midpoints within service runs to shorten temporary cord lengths and reduce trip hazards, improving operational safety without major rewiring. Facility engineers also prefer a Socket Box that combines clear labeling, modular interiors, and proven sealing so routine inspections, component swaps, and surge protection upgrades can happen quickly and predictably.
Assessing the environment and intended use
Before selecting an enclosure, conduct a brief site assessment that catalogs weather exposure, expected mechanical stresses, and human traffic patterns. Determine whether the unit will sit behind landscaping, in a public plaza, near washdown operations, or inside a plant with heavy particulate. Each context imposes different material, IP rating, and mounting requirements. Decide early if the enclosure must support temporary tools, permanent outlets, data ports, or integrated monitoring devices — this scope shapes every subsequent choice.
Materials, finishes, and sealing strategies
Material selection is the first defense against premature failure. UV-stable polymers reduce cracking and discoloration in sun-exposed locations; stainless steel or powder-coated aluminum adds mechanical protection in high-impact or coastal environments. Specify gasket compounds with the appropriate compression set and chemical resistance for cleaning agents used on site. Recessed lid designs and raised sealing channels help preserve seal life through repeated openings. Finally, internal hardware should be corrosion-resistant to prevent contact degradation over time.
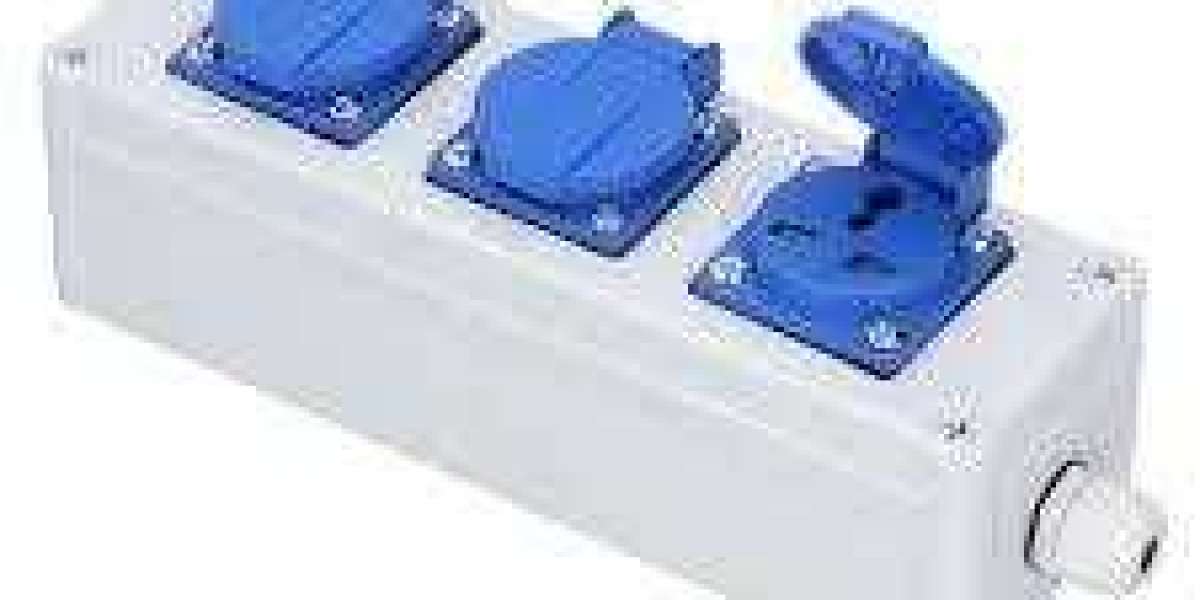
Nante accessory modules and modular interiors
Choosing a modular internal architecture shortens service time and reduces spare-part variety. Look for enclosures that accept removable mounting plates, DIN-rail subframes, and swappable inserts for switches, surge protectors, and metering. Vendor-supplied accessory kits — including spare gaskets, cable glands, and replacement mounting hardware — dramatically reduce mean time to repair. Modular designs also facilitate standardized stocking across multiple locations, simplifying logistics for distributed portfolios.
Electrical wiring, strain relief, and protection
Longevity starts at the terminals. Specify correct conductor preparation, ferrule use, and terminal torque values to avoid overheating and intermittent faults. Route cables with purpose-built strain reliefs and separate power from signal runs to limit EMI and simplify troubleshooting. Incorporate local surge protective devices when long cable runs or exposed feeders increase transient risk. Properly sized busbars, labeled terminal blocks, and color-coded wiring all accelerate diagnostics during maintenance rounds.
Thermal control and condensation management
Even well-sealed enclosures can trap heat or accumulate condensation, both of which shorten component life. Design the internal layout to isolate heat-producing devices from sensitive electronics and use thermally conductive mounting plates when appropriate. For condensation-prone sites, consider filtered breathers, desiccant packs, or thermostatic heaters that manage moisture without compromising ingress protection. For high-current applications, verify temperature rise under load during commissioning.
Mechanical mounting and tamper resistance
Robust mounting prevents physical loosening and reduces vibration-induced failures. Use appropriate anchors for the substrate and consider vibration-damping pads where nearby equipment transmits shock. For public or semi-public installations, add tamper-resistant fasteners, lockable lids, and recessed anchor points to deter theft and casual interference. When aesthetics matter, choose low-gloss or color-matched finishes that blend with architectural elements while preserving durability.
Inspection routines, documentation, and spares planning
Create concise, repeatable checklists for inspections: verify gasket compression, confirm gland torque, inspect for physical damage, and measure contact resistance on essential circuits. Maintain as-built wiring diagrams and a concise spare-part list (gaskets, gland sizes, common module inserts) at each site. Logging replacements and anomalies supports lifecycle forecasting and helps procurement negotiate favorable lead times for recurring parts.
Future-proofing and upgrade paths
Plan for modest growth: reserve space for additional circuits, metering, or simple IoT sensors that monitor temperature or humidity. Selecting enclosures that allow add-on modules or telemetry options saves replacement costs later. Standardized mounting footprints and compatible inserts across product families reduce integration friction when sites evolve or new regulatory needs emerge.
Case applications and configuration examples
For residential landscaping, prioritize weatherproof sealing and low-profile aesthetics; for industrial floors, emphasize impact resistance, thermal segregation, and easy access for electricians; for event or hospitality venues, focus on lockable covers and tamper resistance with discreet finishes. Tailoring configurations to the most common service scenarios minimizes retrofit work and keeps operations predictable.
A thoughtfully specified exterior power enclosure — balanced across materials, wiring discipline, modularity, and a realistic maintenance plan — provides years of dependable service while limiting emergency interventions. For technical data sheets, accessory lists, and installation guides, visit www.nante.com